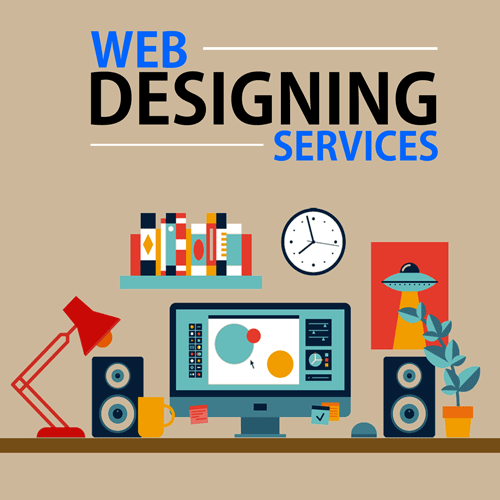
Web design is the art and science of creating websites that are attractive, functional, and user-friendly. Web design is also a highly sought-after skill in the digital age, as more and more businesses and individuals need websites to showcase their products, services, or portfolios.
If you want to learn web design, you might be wondering where to start and what to learn. In this blog post, we will give you a beginner’s guide on how to learn web design.
We will cover the basics of web design, the tools and resources you need, and the steps you can take to improve your skills. We will also help you find a web design agency near me that can offer you professional guidance and support.
What is Web Design and Why is it Important?
Web design is the process of planning, creating, and maintaining websites. Web design involves both the visual appearance and the functionality of a website.
Web design is important because it affects how people perceive and interact with your website. A good web design can:
- Attract and retain visitors
- Communicate your message and brand identity
- Enhance your credibility and reputation
- Increase your conversions and sales
- Improve your user experience and satisfaction
On the other hand, a poor web design can:
- Repel and frustrate visitors
- Confuse and mislead your audience
- Damage your image and trustworthiness
- Reduce your traffic and revenue
- Harm your user experience and satisfaction
As you can see, web design can have a significant impact on your online success. That’s why it’s essential to learn how to create websites that are both beautiful and effective.
What are the Main Components of Web Design?
Web design consists of several components that work together to create a website. These components include:
- Content: The information and media that you provide on your website, such as text, images, videos, audio, etc.
- Layout: The way you arrange and organize your content on your website, such as columns, grids, alignment, spacing, etc.
- Typography: The style and appearance of your text on your website, such as fonts, sizes, colors, weights, etc.
- Color: The choice and combination of colors that you use on your website, such as backgrounds, foregrounds, accents, contrasts, etc.
- Graphics: The visual elements that you use on your website, such as logos, icons, illustrations, animations, etc.
- Navigation: The system that you use to help your visitors find their way around your website, such as menus, buttons, links, breadcrumbs, etc.
- Interaction: The way you enable your visitors to interact with your website, such as forms, inputs, feedback, hover effects, etc.
● Accessibility: The degree to which you make your website accessible and inclusive for users with disabilities or impairments, such as screen readers, keyboard navigation, alt text, etc.
To create a successful website, you need to master all these components and make sure they work well together.
How to Plan, Design, and Build Your First Website Step by Step?
Now that you have some basic knowledge and tools for web design, you are ready to create your first website.
Here are the steps to follow:
Step 1: Set your goal
Before you start designing your website, you need to have a clear goal in mind. What is the purpose of your website? What do you want to achieve with it? Who is your target audience? How do you want them to feel and act when they visit your website?
Having a goal will help you focus and guide your web design decisions. It will also help you measure and evaluate your website’s performance and success.
For example, let’s say you want to create a personal portfolio website to showcase your web design skills and projects. Your goal could be something like this:
- To attract and impress potential clients and employers with my web design portfolio
- To demonstrate my web design expertise and experience with various projects and technologies
- To communicate my personality and style as a web designer
Step 2: Choose your website builder
The next step is to choose the right website builder for your goal. As we mentioned earlier, there are many options available, but we recommend Webflow for beginners who want to learn web design visually and interactively.
Webflow allows you to design, build, and launch websites without coding. You can use Webflow’s templates and CMS to create websites faster and easier.
You can also use Webflow’s designer tool to create websites from scratch with full control over every aspect of your web design.
To get started with Webflow, you need to sign up for a free account. Then, you can choose a template or start a blank project.
Step 3: Define your layout
The layout is the way you arrange and organize your content on your website. The layout affects how your visitors perceive and navigate your website. A good layout should be clear, consistent, and responsive.
To define your layout, you need to consider the following factors:
- The hierarchy of your content: The order and importance of your content elements, such as headings, paragraphs, images, etc.
- The grid system: The framework that divides your website into columns and rows, which helps you align and position your content elements.
- The white space: The space between your content elements, which helps you create contrast and balance on your website.
- The breakpoints: The points where your layout changes or adapts to different screen sizes and devices.
To create your layout, you can use Webflow’s designer tool, which lets you drag and drop content elements onto the canvas.
You can also use Webflow’s grid tool, which lets you create flexible and responsive grids for your layout. You can also use Webflow’s style panel, which lets you adjust the size, margin, padding, alignment, etc. of your content elements.
For example, let’s say you want to create a simple layout for your portfolio website. Your layout could look something like this:
| Section | Content |
| Header | Logo, Navigation menu (Home, About, Portfolio, Contact) |
| Hero section | A catchy headline that introduces yourself and your work, A call to action button that leads to your portfolio or contact page |
| About section | A brief introduction of who you are, what you do, and why you do it, A photo of yourself or your team, A list of your skills or services |
| Portfolio section | A grid or carousel of your best projects or works, Each project or work should have a title, a thumbnail image, and a short description, A link to view more details or see the live version of each project or work |
| Testimonials section | A slider or a list of testimonials from your previous clients or collaborators, Each testimonial should have a name, a photo, and a quote |
| Contact section | A contact form that allows visitors to send you a message, Your email address and phone number, Your social media icons |
| Footer | A copyright notice, A link to your privacy policy and terms of service |
Step 4: Choose your color scheme
The color scheme is the choice and combination of colors that you use on your website. The color scheme affects the mood and emotion of your website, as well as its readability and contrast.
To choose your color scheme, you need to understand some basic concepts of color theory. Color theory is the practice of using the meaning and harmony of colors to create a sensory experience. Color theory can help you:
- Choose colors that match your goal and message
- Create appealing and balanced color combinations
- Use colors to influence emotions and actions
To apply color theory, you can use a color wheel, which is a circular diagram that shows the relationships between colors. A color wheel can help you create different types of color schemes, such as:
- Monochromatic: A color scheme that uses different shades, tints, and tones of one color
- Analogous: A color scheme that uses colors that are adjacent to each other on the color wheel
- Complementary: A color scheme that uses colors that are opposite to each other on the color wheel
- Triadic: A color scheme that uses colors that are evenly spaced around the color wheel
- Tetradic: A color scheme that uses two pairs of complementary colors
To create your color scheme, you can use Webflow’s style panel, which lets you choose and apply colors to your content elements. You can also use Webflow’s global colors feature, which lets you create and manage a set of colors that you can reuse throughout your website.
For example, let’s say you want to create a colorful and vibrant color scheme for your portfolio website. Your color scheme could look something like this:
| Primary | #FFC107 |
| Secondary | #2196F3 |
| Accent | #FF5722 |
| Background | #FFFFFF |
| Text | #212121 |
Step 5: Gather your content
The content is the information and media that you provide on your website, such as text, images, videos, audio, etc. The content is the most important part of your website, as it delivers your message and value to your visitors.
To gather your content, you need to consider the following factors:
- The purpose of your content: What do you want to communicate and achieve with your content?
- The type of your content: What format and medium do you want to use for your content?
- The quality of your content: How do you ensure that your content is relevant, accurate, clear, and engaging?
- The quantity of your content: How much content do you need to provide on your website?
- The optimization of your content: How do you make sure that your content is SEO-friendly and accessible?
To create your content, you can use various tools and resources, such as:
- Text editors: Tools that let you write and edit text for your website, such as Google Docs or Microsoft Word
- Image editors: Tools that let you create and edit images for your website, such as Photoshop or Canva
- Video editors: Tools that let you create and edit videos for your websites, such as Premiere Pro or iMovie
- Audio editors: Tools that let you create and edit audio for your website, such as Audacity or GarageBand
- Content management systems (CMS): Tools that let you store and manage your content for your website, such as Webflow CMS or WordPress
For example, let’s say you want to gather some content for your portfolio website. Your content could include:
- A brief introduction about yourself and your web design skills
- A list of web design projects that you have worked on or contributed to
- A testimonial or a quote from a previous client or employer
- A contact form or a link to your social media profiles
Step 6: Add the right pages
The pages are the sections or parts of your website that contain your content. The pages are what your visitors see when they visit your website. The pages should be organized and structured logically and intuitively.
To add the right pages, you need to consider the following factors:
- The goal of each page: What do you want each page to accomplish?
- The layout of each page: How do you want each page to look like?
- The navigation of each page: How do you want each page to be linked to other pages?
- The responsiveness of each page: How do you want each page to adapt to different screen sizes and devices?
To create your pages, you can use Webflow’s designer tool, which lets you add and edit pages for your website. You can also use Webflow’s templates and CMS to create pages faster and easier.
For example, let’s say you want to add some pages to your portfolio website. Your pages could include:
- A home page that introduces yourself and showcases your best web design projects
- A portfolio page that displays all your web design projects in detail
- An about page that tells your story and your web design philosophy
- A contact page that invites your visitors to get in touch with you
Step 7: Design your website elements
The website elements are the visual and interactive components that you use on your website, such as logos, icons, illustrations, animations, forms, inputs, feedback, hover effects, etc. The website elements enhance the appearance and functionality of your website.
To design your website elements, you need to consider the following factors:
- The purpose of each element: What do you want each element to do or communicate?
- The style of each element: How do you want each element to look like?
- The interaction of each element: How do you want each element to behave or respond?
- The accessibility of each element: How do you make each element accessible and inclusive for all users?
To create your website elements, you can use Webflow’s designer tool, which lets you add and edit elements for your website. You can also use Webflow’s style panel, which lets you adjust the size, color, position, animation, etc. of your elements.
For example, let’s say you want to design some website elements for your portfolio website. Your elements could include:
- A logo that represents your name and web design style
- An icon that indicates the type of web design project
- An illustration that adds some personality and flair to your website
- An animation that creates some movement and interest on your website
- A form that allows your visitors to send you a message or a request
- An input that lets your visitors enter their name and email address
- The feedback that confirms or rejects the input or the form submission
- A hover effect that changes the color or the shape of an element when the cursor moves over it.
Conclusion
Web design and development is a rewarding and exciting skill that can help you create websites that are attractive, functional, and user-friendly. Web design is also a skill that you can learn by yourself with some tools and resources. So, don’t procrastinate and get to work!